
Sending Consent Forms for Image Privacy
Collecting image consent has traditionally meant paper forms, a spreadsheet, and someone remembering to check it before every newsletter goes out.
Consent Forms built into Hail replace all of that. Send a request by email, let each person choose their own privacy preferences, and once you've approved their response Hail adds them to your People Locker and applies those preferences automatically from then on.
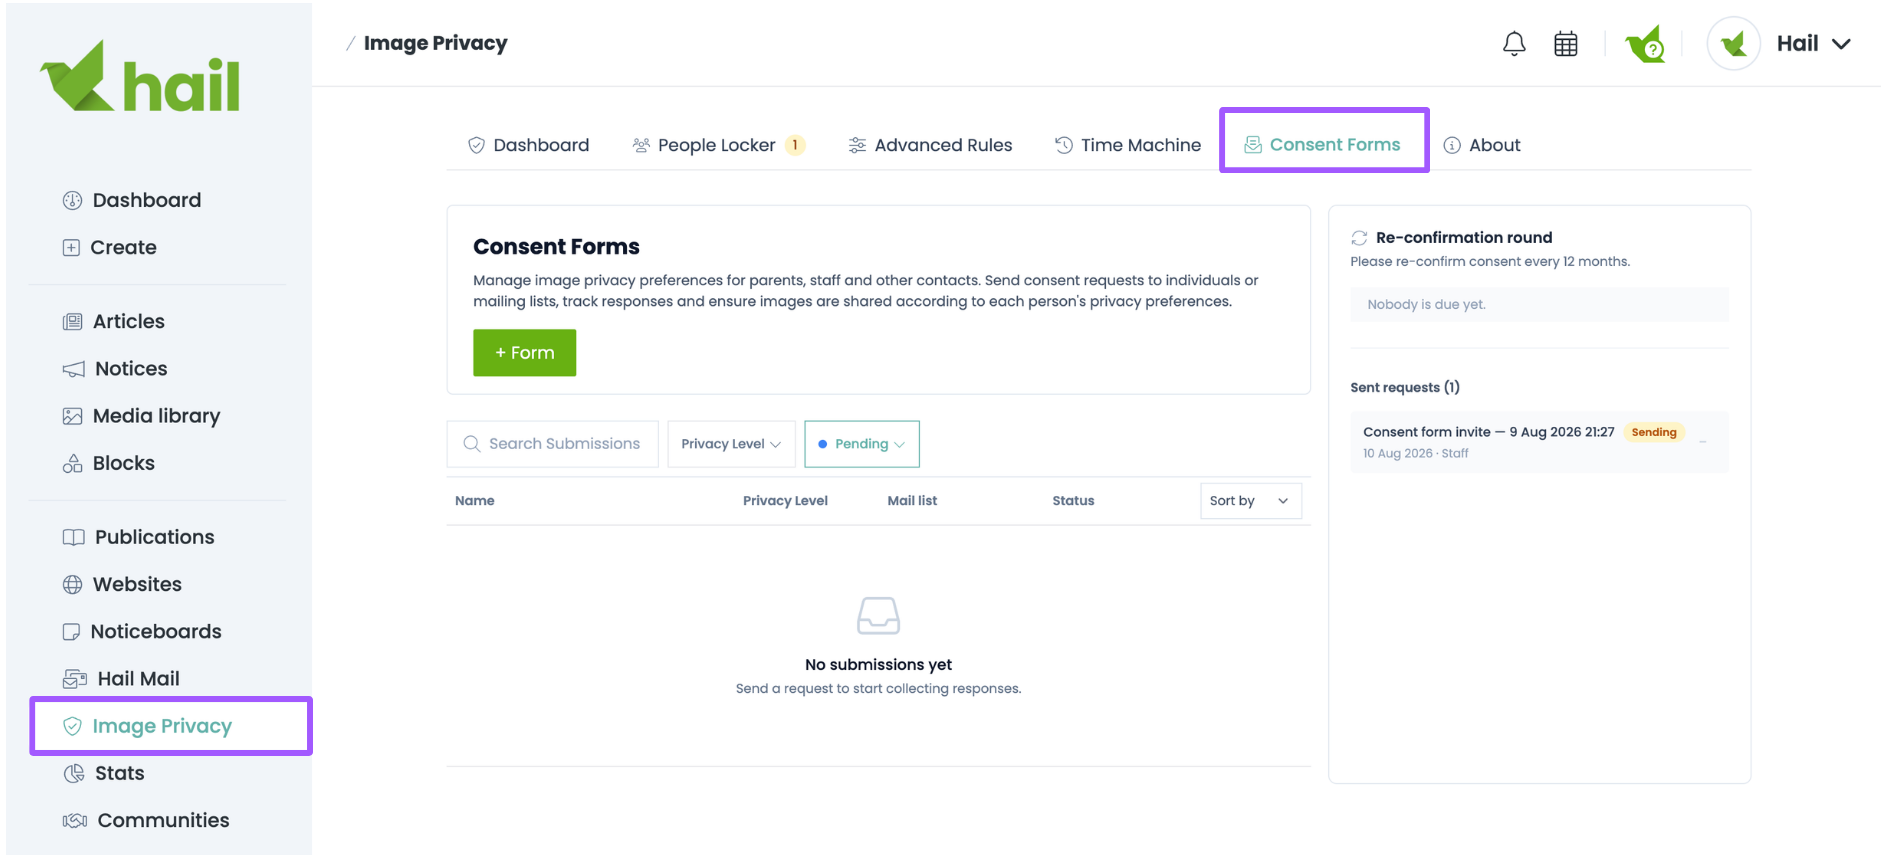
Head to Image Privacy in the left-hand menu and open the Consent Forms tab.
Step 1: Create a request
- Click Create first request (or Send Request if you've sent one before).
- Choose your Form type - Parent or Staff. (for education customers only)
- Choose who to send it to under Send with: a Mail list, individual Email addresses, or your Student management system.
- Customise the email messaging.
- Click Send Request.
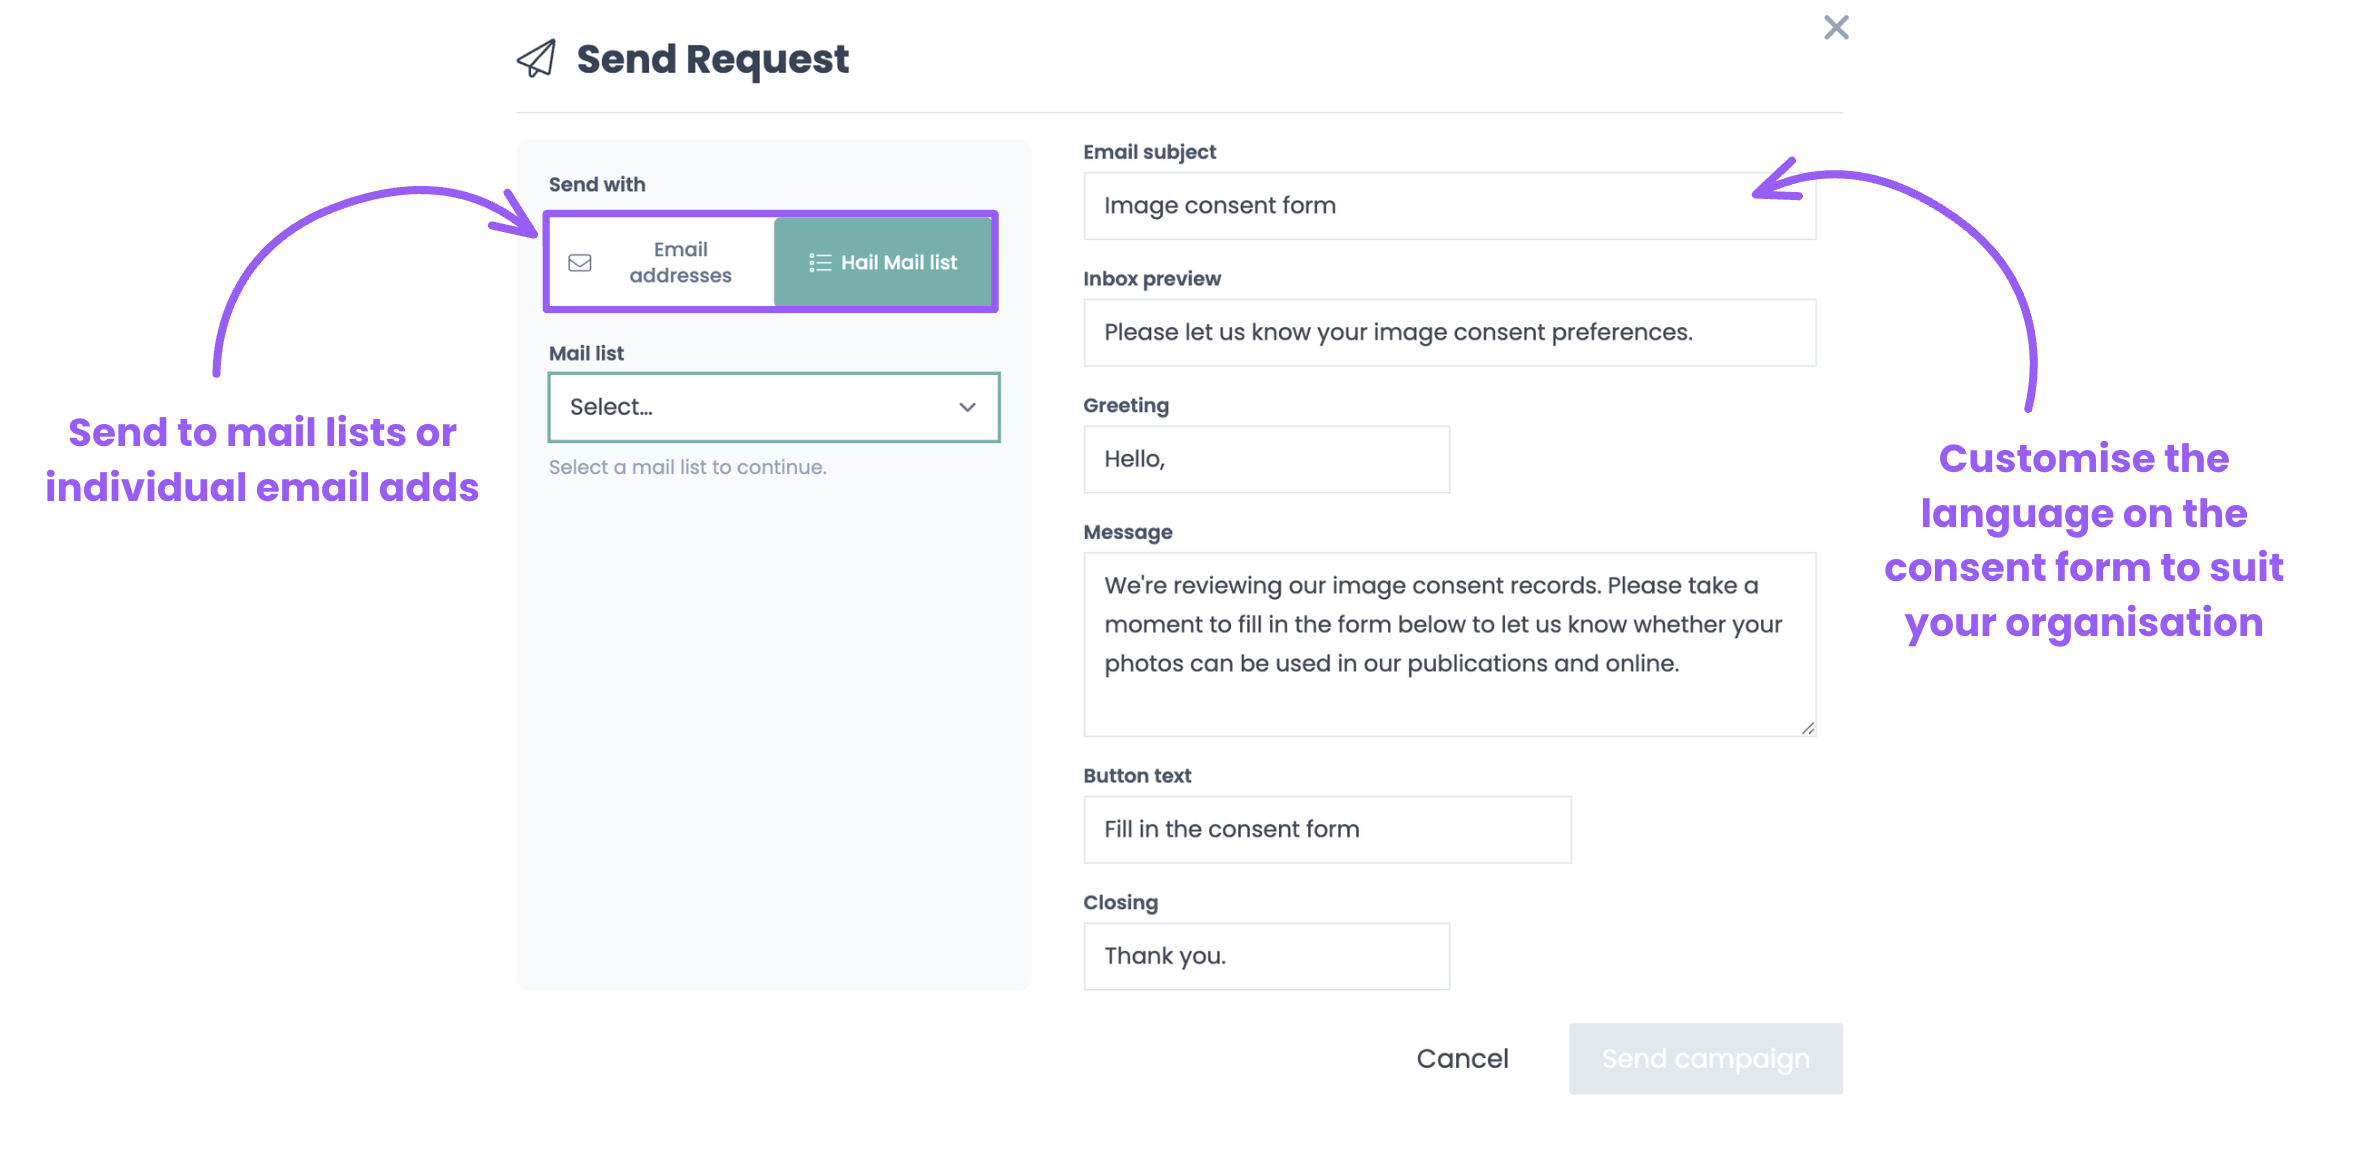
Tip. The message is where you explain why you're asking. Response rates are much better when people understand what you'll do with their answer - a couple of sentences about how your school shares photos goes a long way.
Step 2: What recipients see


Each person receives a personalised email with a secure link unique to them. The form walks them through choosing how their images can be used:
- Visible - images can be shared normally.
- Hide on social media - hidden on Facebook, Instagram and other external platforms.
- Hidden (but visible in groups) - hidden unless they're part of a group photo.
- Always hidden - the highest level of protection, hidden everywhere including group photos.
They can also upload a recent reference photo, which helps Hail recognise them more accurately. The whole thing takes a couple of minutes.
Step 3: Review submissions
Responses come back into the Consent Forms tab, where you can see what's pending, what's been completed, and your overall response rate.
- Click a pending submission to open it.
- Check the details and the reference photo.
- Approve or reject it.
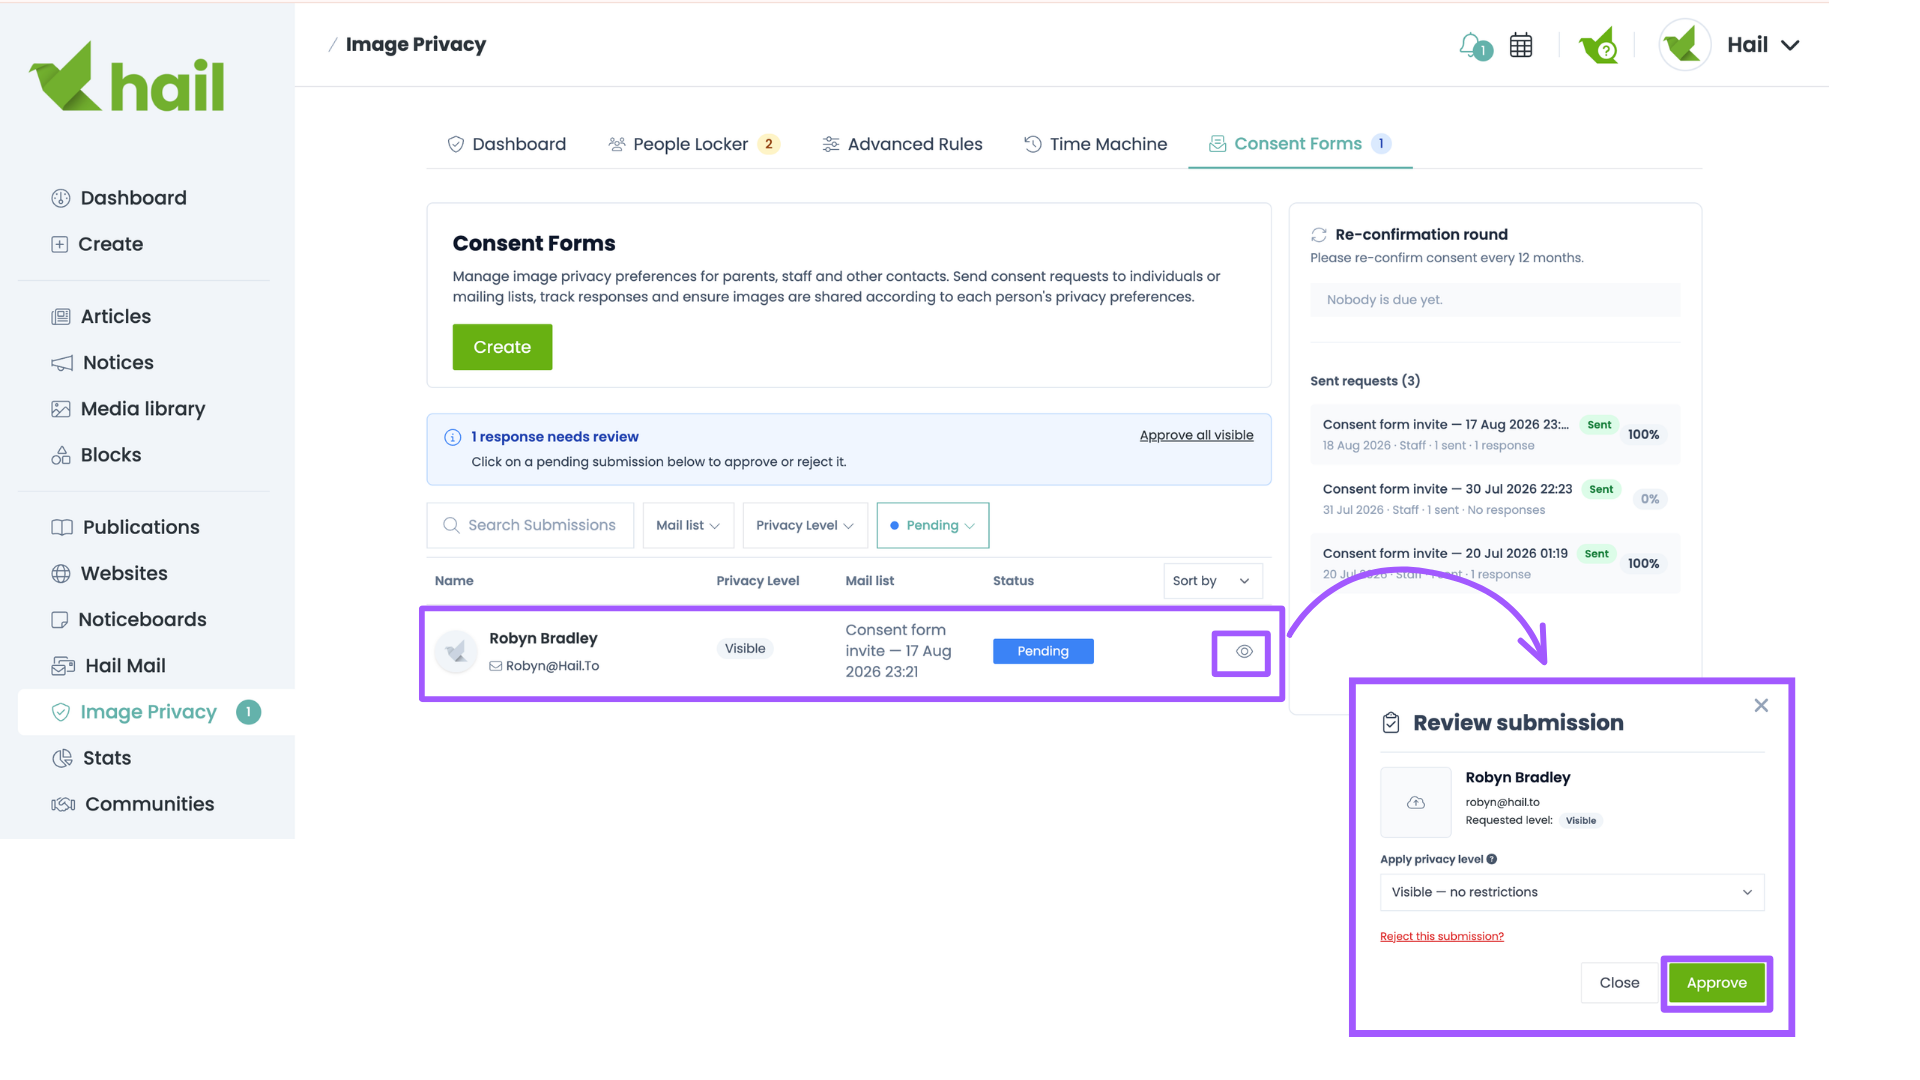
Approved submissions are added to your People Locker automatically with the preferences that person chose. From that point on, every new image you upload is checked against them.
Note: Responses aren't applied until you approve them. This is deliberate - it gives you a chance to check that the reference photo is usable and that the response is genuinely from the person you asked.
Keeping consent current
Privacy preferences change, students grow up, and consent collected three years ago may not reflect what a family wants today.
Hail can prompt you when it's time to run a Re-confirmation round, based on the Consent expiry setting on your Advanced Rules tab. When people are due, you'll see them listed and can click Send now to send everyone a fresh request in one go.
If someone doesn't re-confirm, they're hidden for a one-month grace period and then removed from Image Privacy - so lapsed consent never quietly becomes permission.
Why use Consent Forms
- Collect image privacy preferences digitally instead of on paper.
- Keep an auditable record of every response.
- Cut out the manual admin of tracking who said what.
- Apply preferences automatically across everything you publish.
- Give people genuine, visible control over how their images are used.