
Running a Time Machine Scan
Image Privacy protects people in images you upload from now moving forward. But what about the newsletter you sent in March, or the photos on your website from last year's prizegiving?
That's what Time Machine is for. It searches the content you've already published, finds where a person appears, and lets you decide what to do about each image - extending someone's privacy preferences backwards in time. There is a cost involved in using this feature.
Head to Image Privacy in the left-hand menu and open the Time Machine tab.
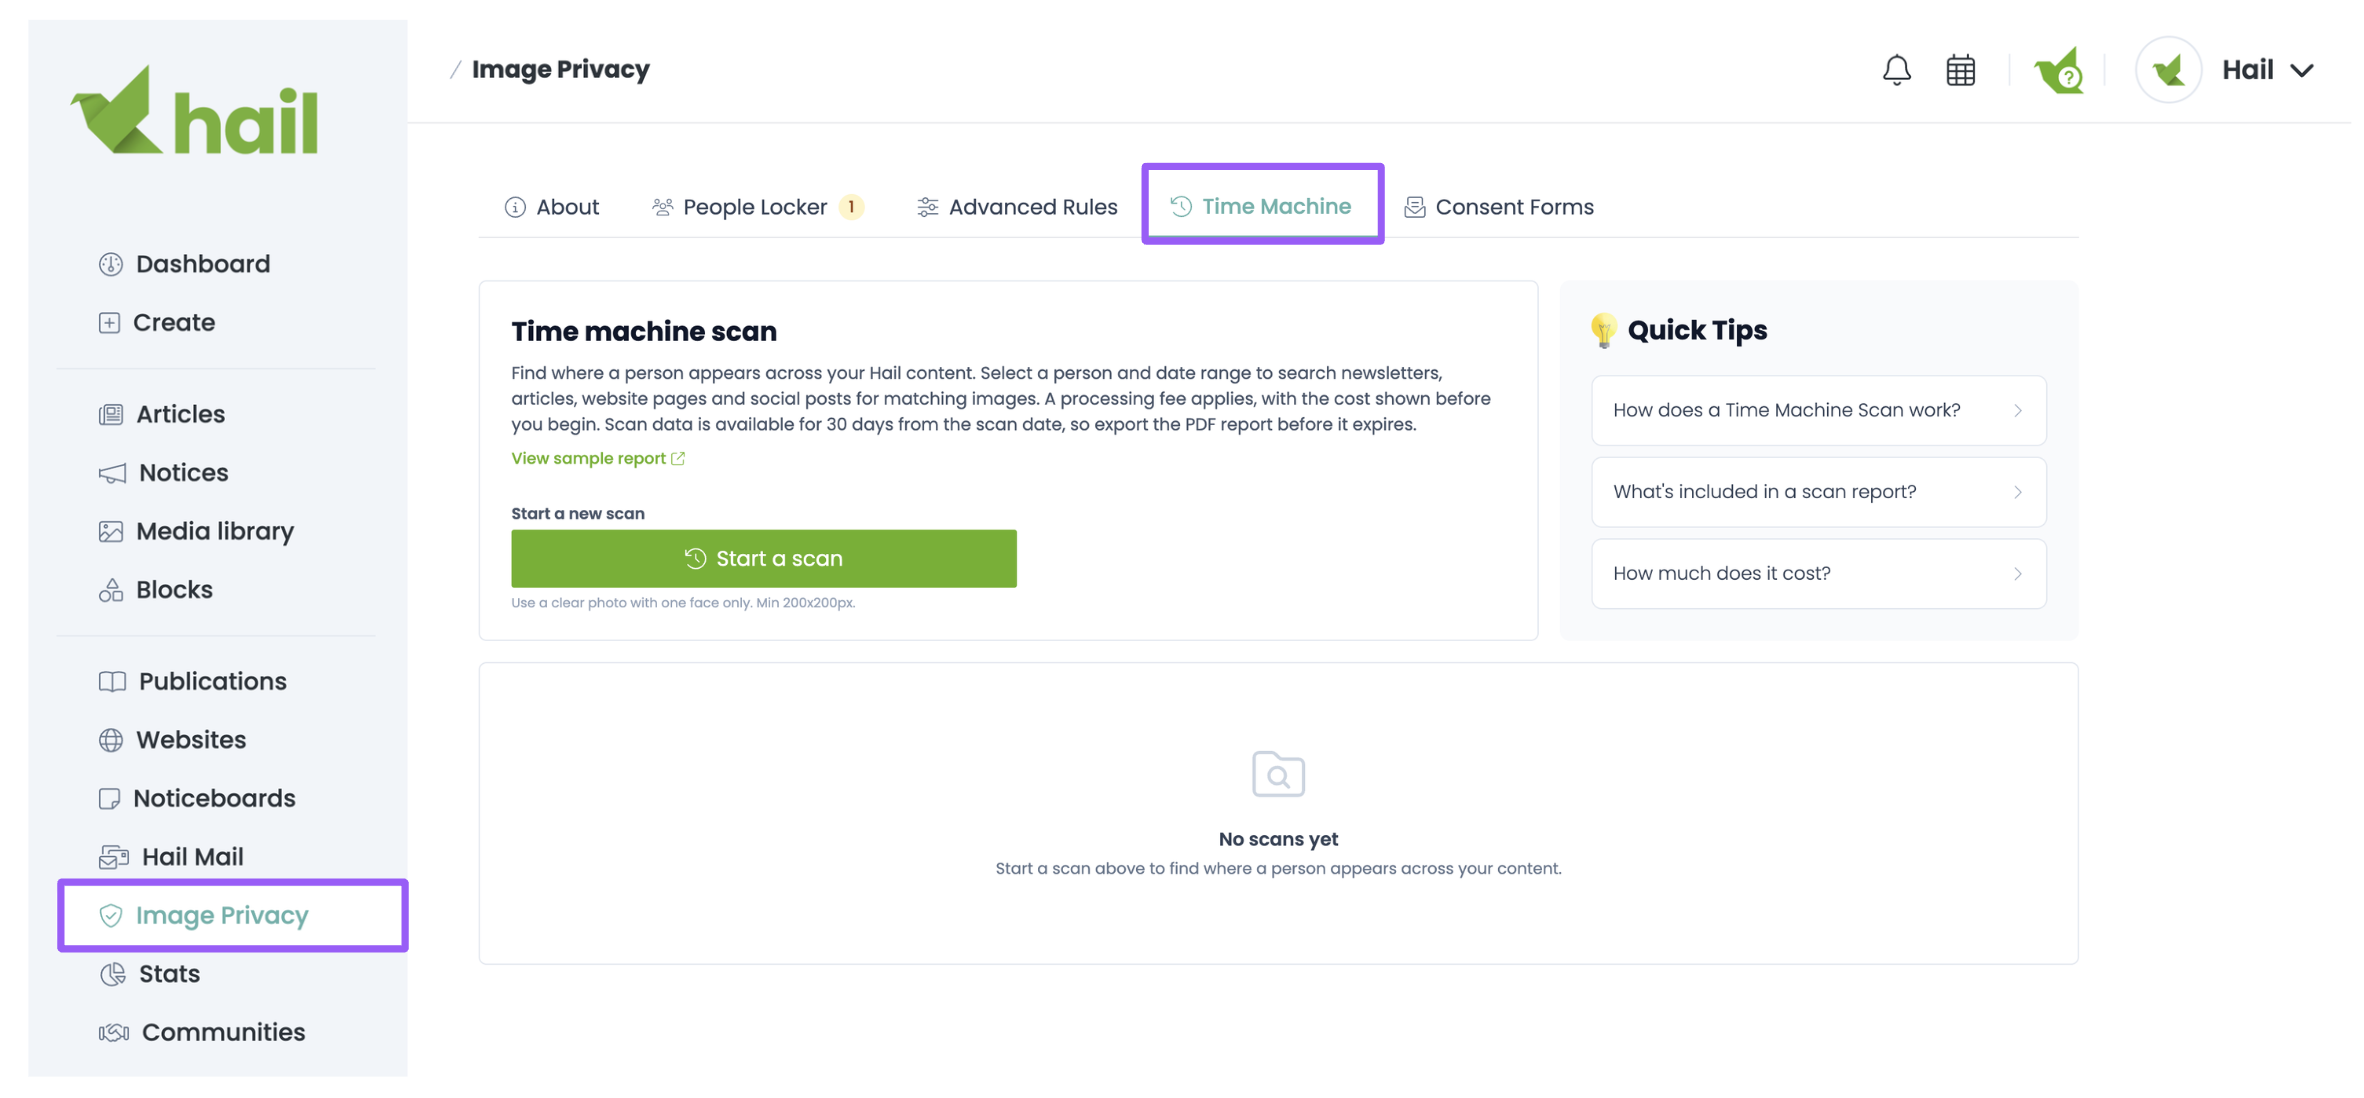
Reasons you'd run a Time Machine Scan
- Someone has been added to your People Locker after images were already published and they require privacy going back in time.
- A person's privacy preferences have changed, or consent has been withdrawn.
- An urgent privacy, safety or welfare situation means you need to find where someone appears, quickly.
How to run a scan
- Click Start a scan.
- Set the Scan period using Scan from and Scan to, or tick Scan every image in my library to search everything. This is an important step as it determines the number of images we will need to scan and the cost of the scan.
- Choose someone from your People Locker, or Upload a photo of the person you're searching for.
- Record the authorisation details for the scan - who approved it and why.
- Review the Cost calculation, and pay for the scan.
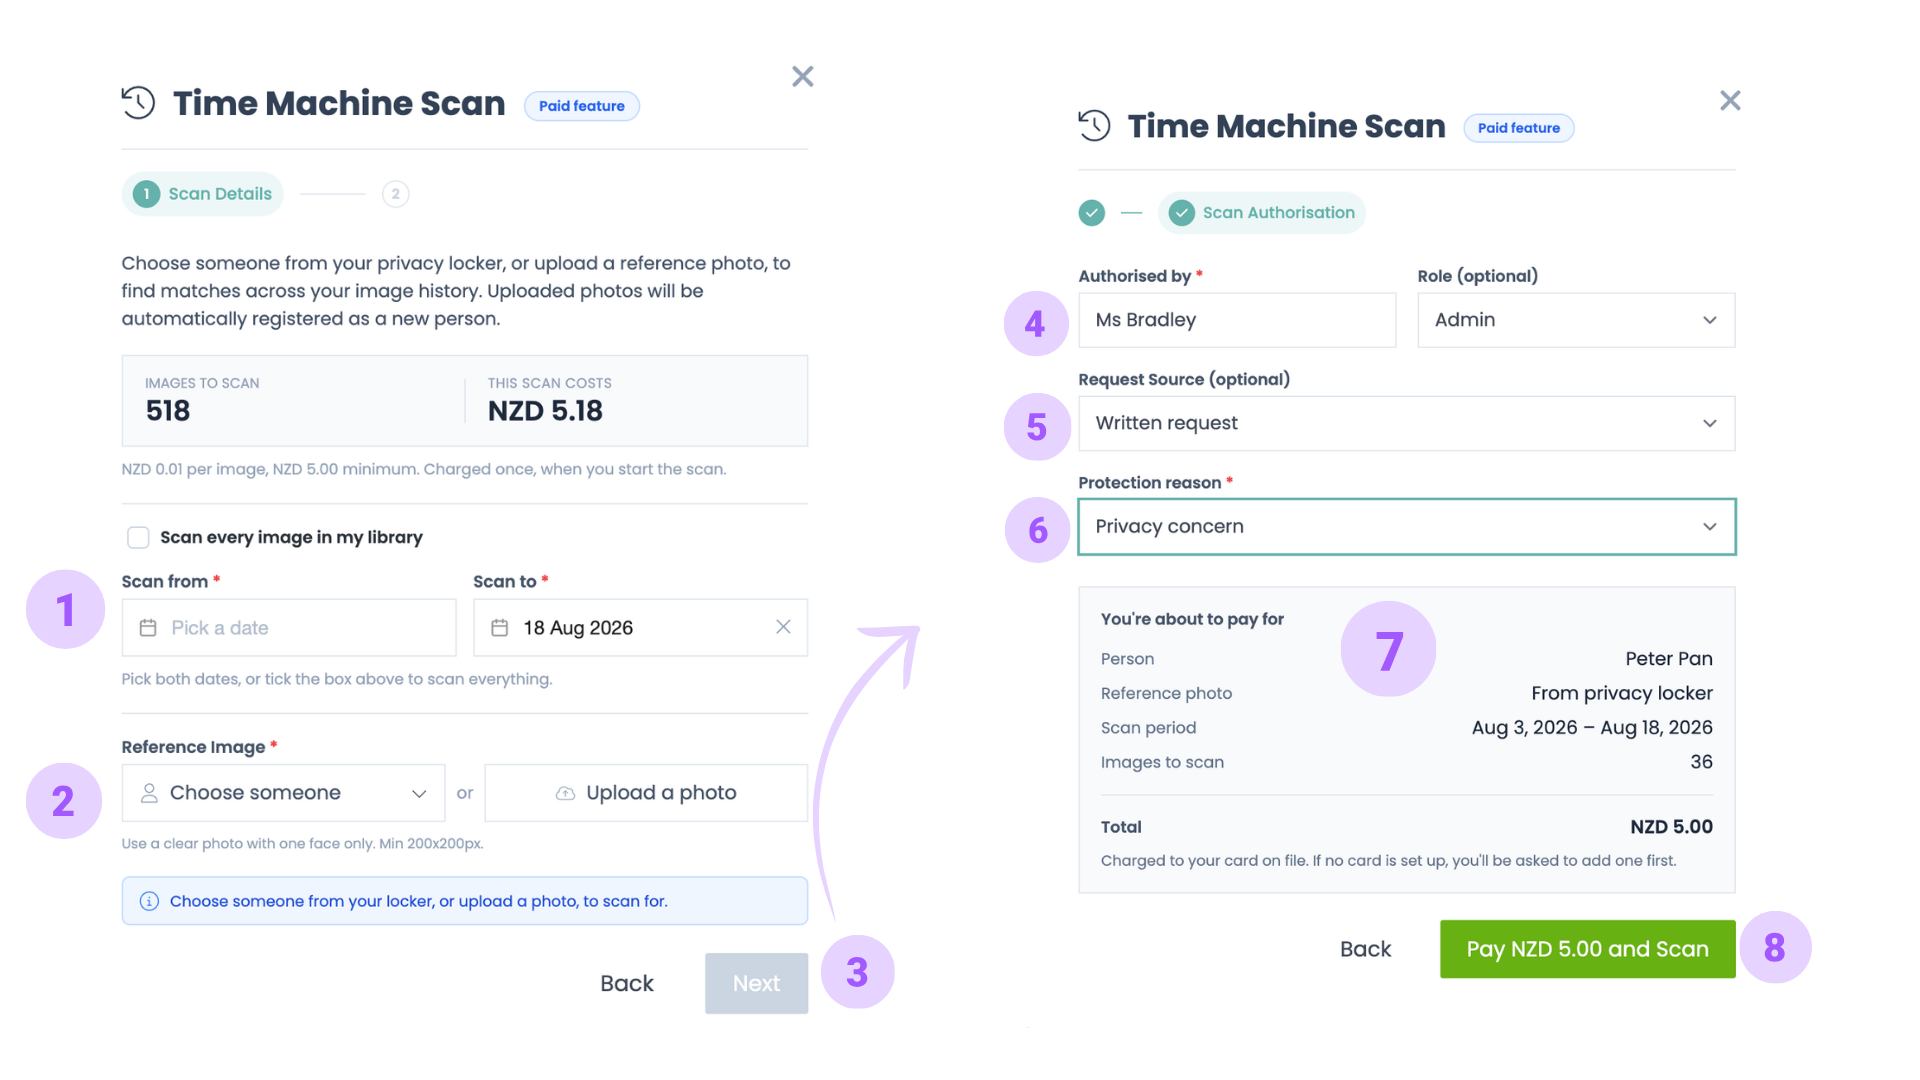
The scan runs in the background and usually takes a few minutes. Results appear automatically, and you'll get an email when it's finished - no need to sit and watch it.
💰 What it costs
Time Machine Scans are a paid feature, charged per scan rather than as part of your subscription. The price depends on how many images fall inside the date range you've chosen.
You'll always see the exact cost before you commit. Start the process, choose your person and date range, and Hail shows you the number of images to be scanned and the total - you can stop there if you'd rather not proceed or refine the date to bring the cost down.
Scans are charged to the card on file for your organisation. If you don't have one set up, you'll be asked to add one first.
Tip: Narrowing the date range is the simplest way to keep a scan affordable. If you know roughly when someone joined or when the images of them were published, scan that window rather than your whole library.
Reviewing the results: 3 step process.

Review the matches:
When the scan finishes you'll get a list of every possible match. Nothing is changed automatically - you review each one and decide.
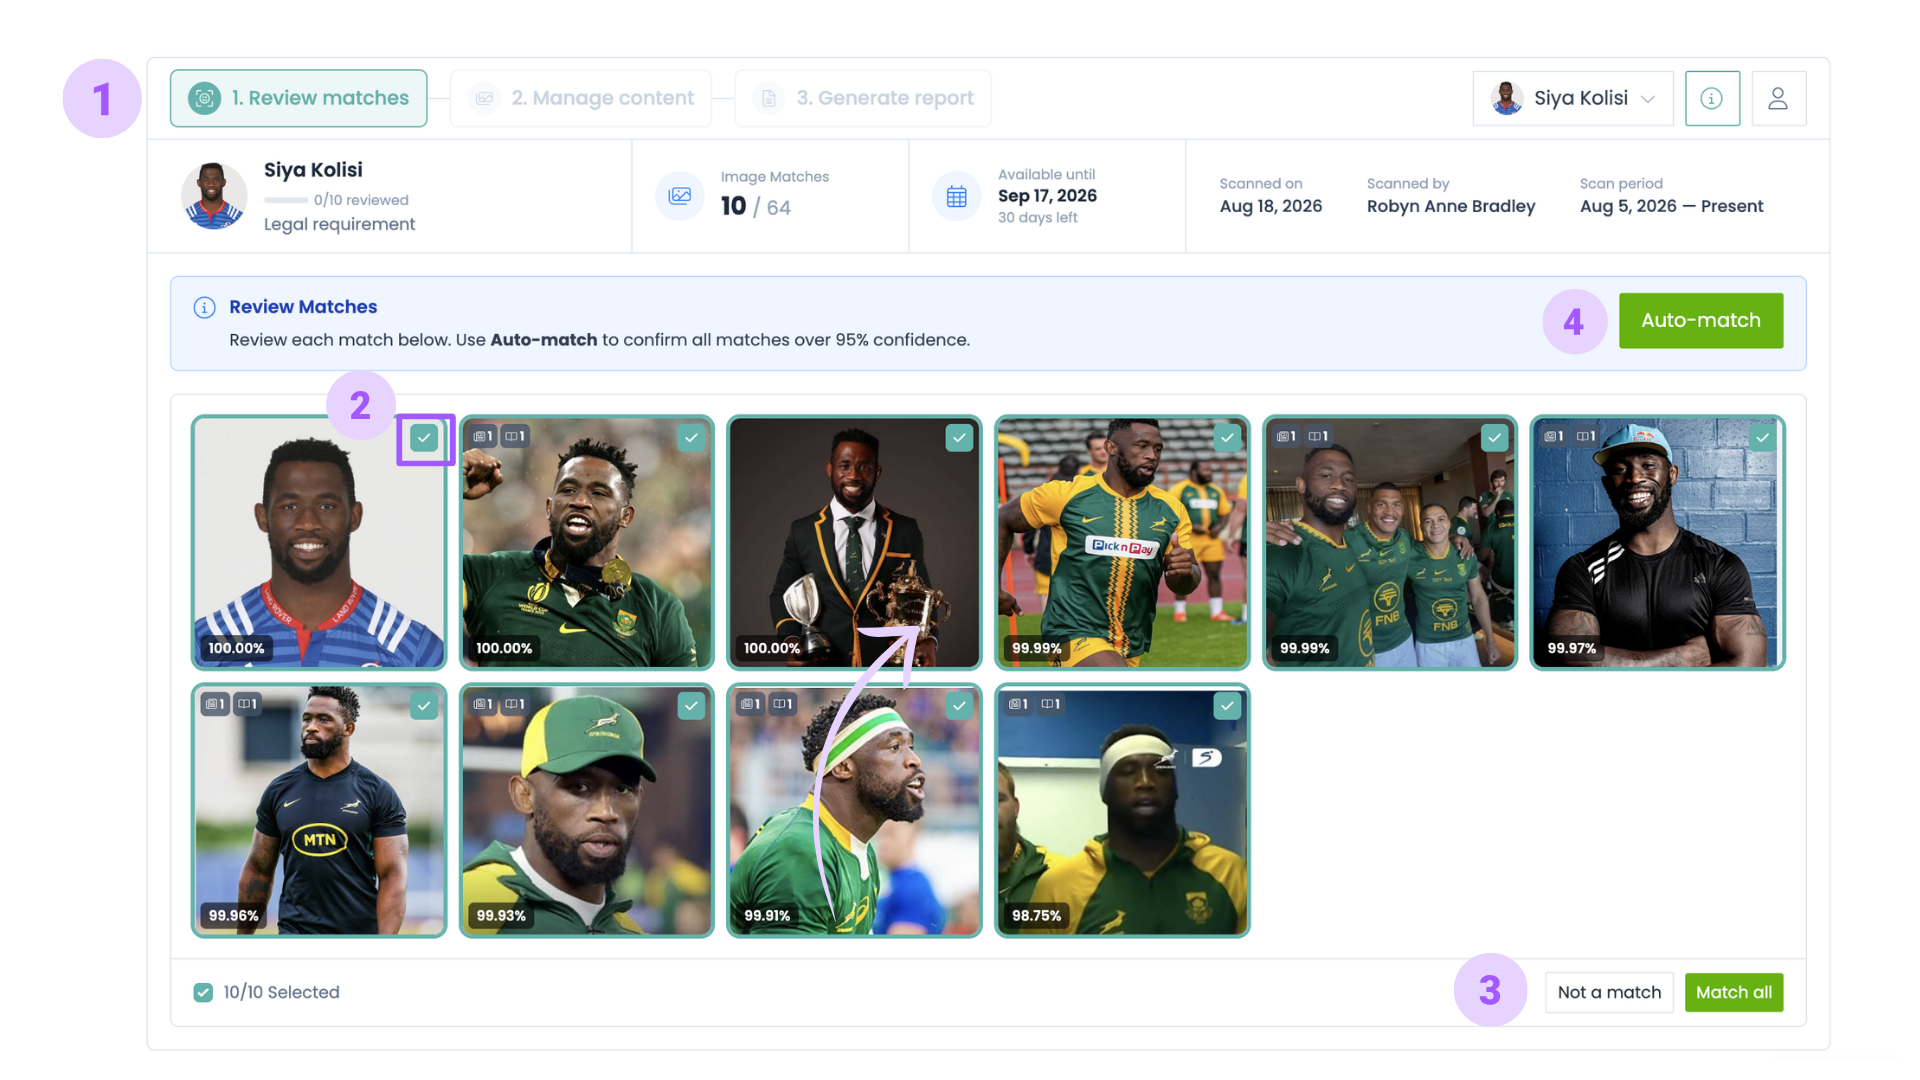
- Click Review Matches to work through the results.
- Use the multi select boxes to take bulk action
- Confirm whether each suggestion is genuinely the person you're looking for - use the 'not a match' or 'match all' options to confirm or reject the matches. OR:
- Use Auto-match to accept the confident matches in bulk, then handle the rest by hand.
Manage content:
Once matches are confirmed, click Manage Content to see where each image you matched is actually used - which articles, newsletters, notices and website pages it appears in - and take action:
- Protect - cover the person's face wherever the image appears.
- Remove - take the image out of that piece of content and out of public view.
- Delete - remove the image entirely, where that's the right call.
- Leave it unchanged.
How to take action:
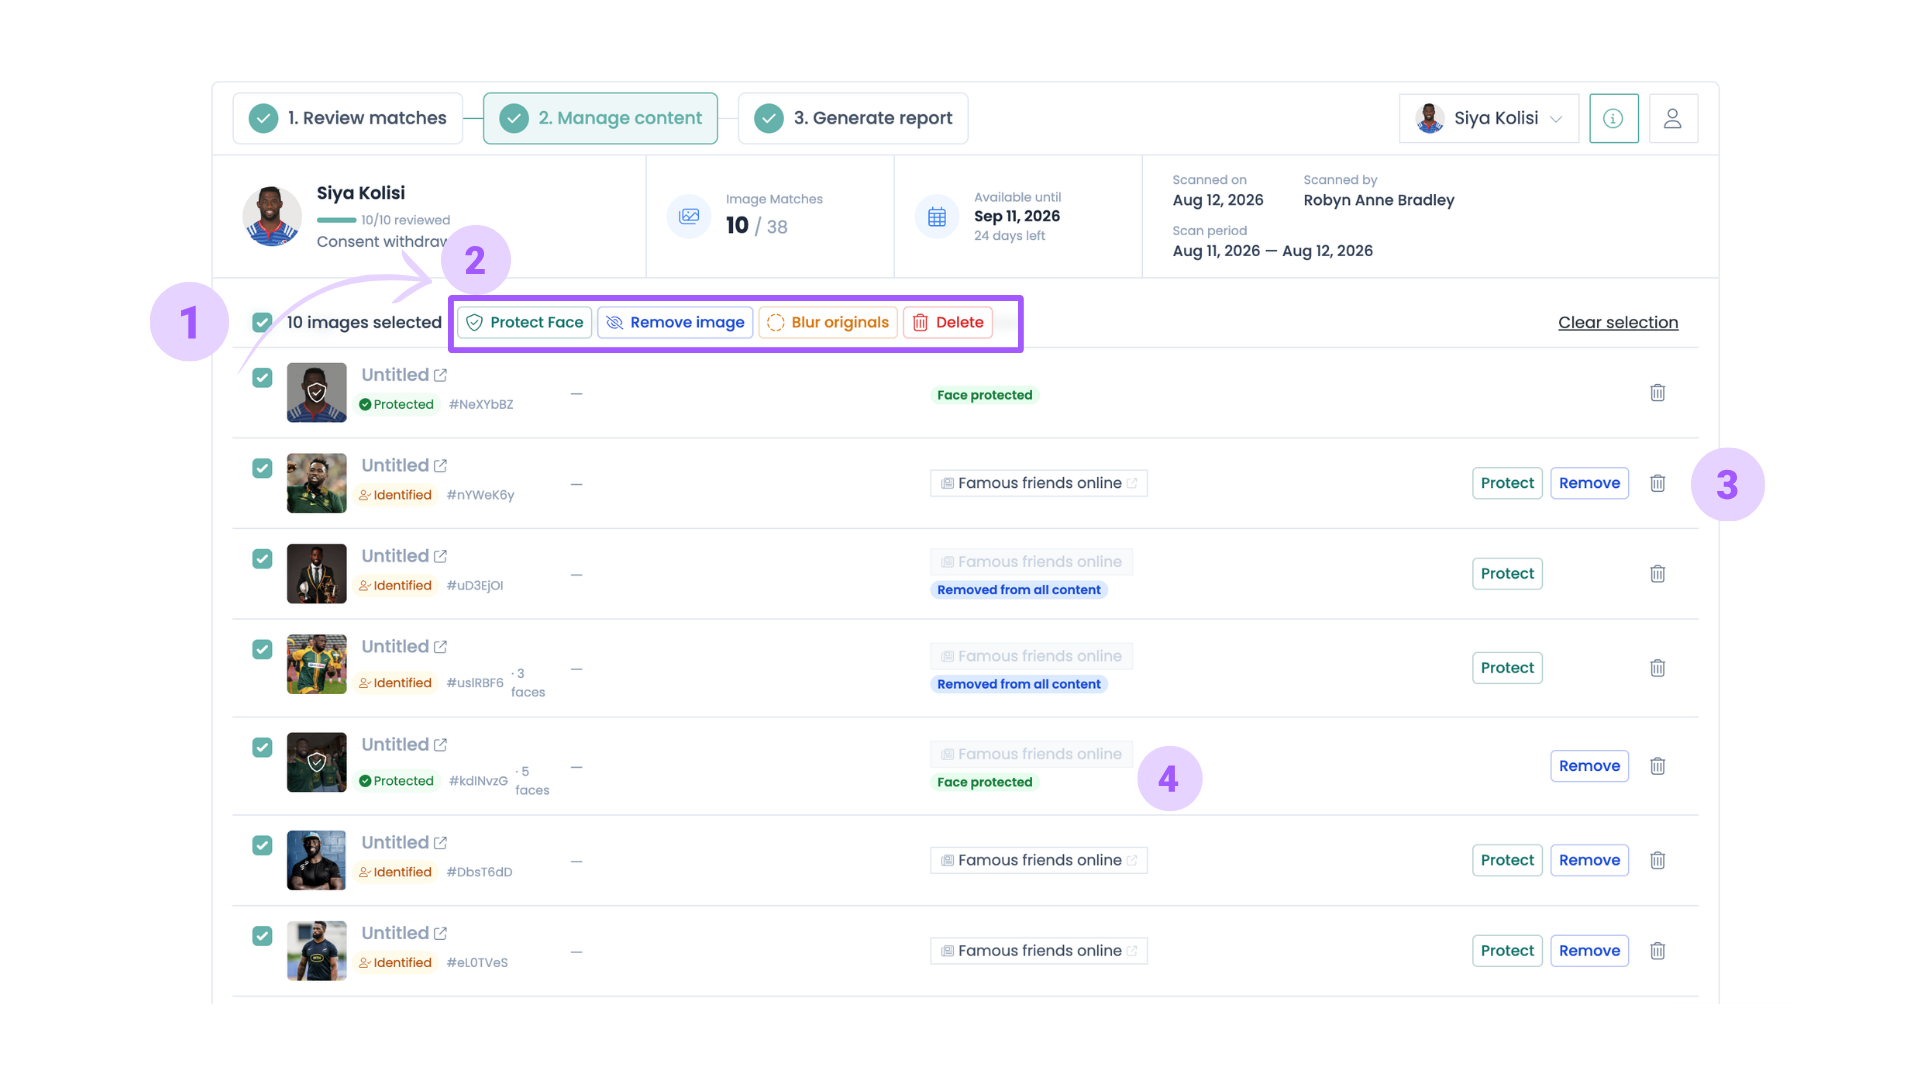
- Select the images you want to manage
Use the checkboxes to select one or more image matches.
The counter updates to show how many images are currently selected.
Tip: Select multiple images to perform the same action across all of them at once.
- Apply a bulk action
Once you've selected images, the action bar becomes available.
Choose the action you'd like to apply to all selected images:
| Action | What it does |
|---|---|
| Protect Face | Blurs the person's face in the selected images. |
| Remove Image | Removes the image from published Hail content while keeping it in your Media Library as an 'unpublished' image |
| Blur Originals | Blurs the original image stored in your Media Library. This cannot be undone. |
| Delete | Permanently deletes the selected images from Hail. |
- Manage individual images
If only one image needs attention, you can use the action buttons on that row instead of selecting multiple images. This allows you to protect or remove images one at a time as you slowly work through your list.
- Check the protection status
Each image displays its current status so you can quickly see what has already been done and what still needs doing.
Examples include:
- Face protected - the person's face has already been blurred.
- Removed from all content - the image has been unpublished from all Hail content.
- Protected - no further protection is required.
This helps you avoid repeating actions that have already been completed.
Tip: You can combine bulk and individual actions. For example, protect the faces in ALL images at once, then return to take secondary actions for specific images (like delete) if needed.
Note: Content shared to external platforms can't be changed from inside Hail. Where a scan finds an image that went to Facebook, Instagram or LinkedIn, you'll need to remove or replace it on that platform directly, then mark it as Reviewed so your records stay accurate. If you shared it from within Hail to Social Media, we will provide the link for you to easily find that content and take action.
Reports and record keeping
Every scan produces a report you can download as a PDF, showing the images matched, where they were used, and what action was taken. It's designed to be the record you keep when you've acted on a privacy or safety request.
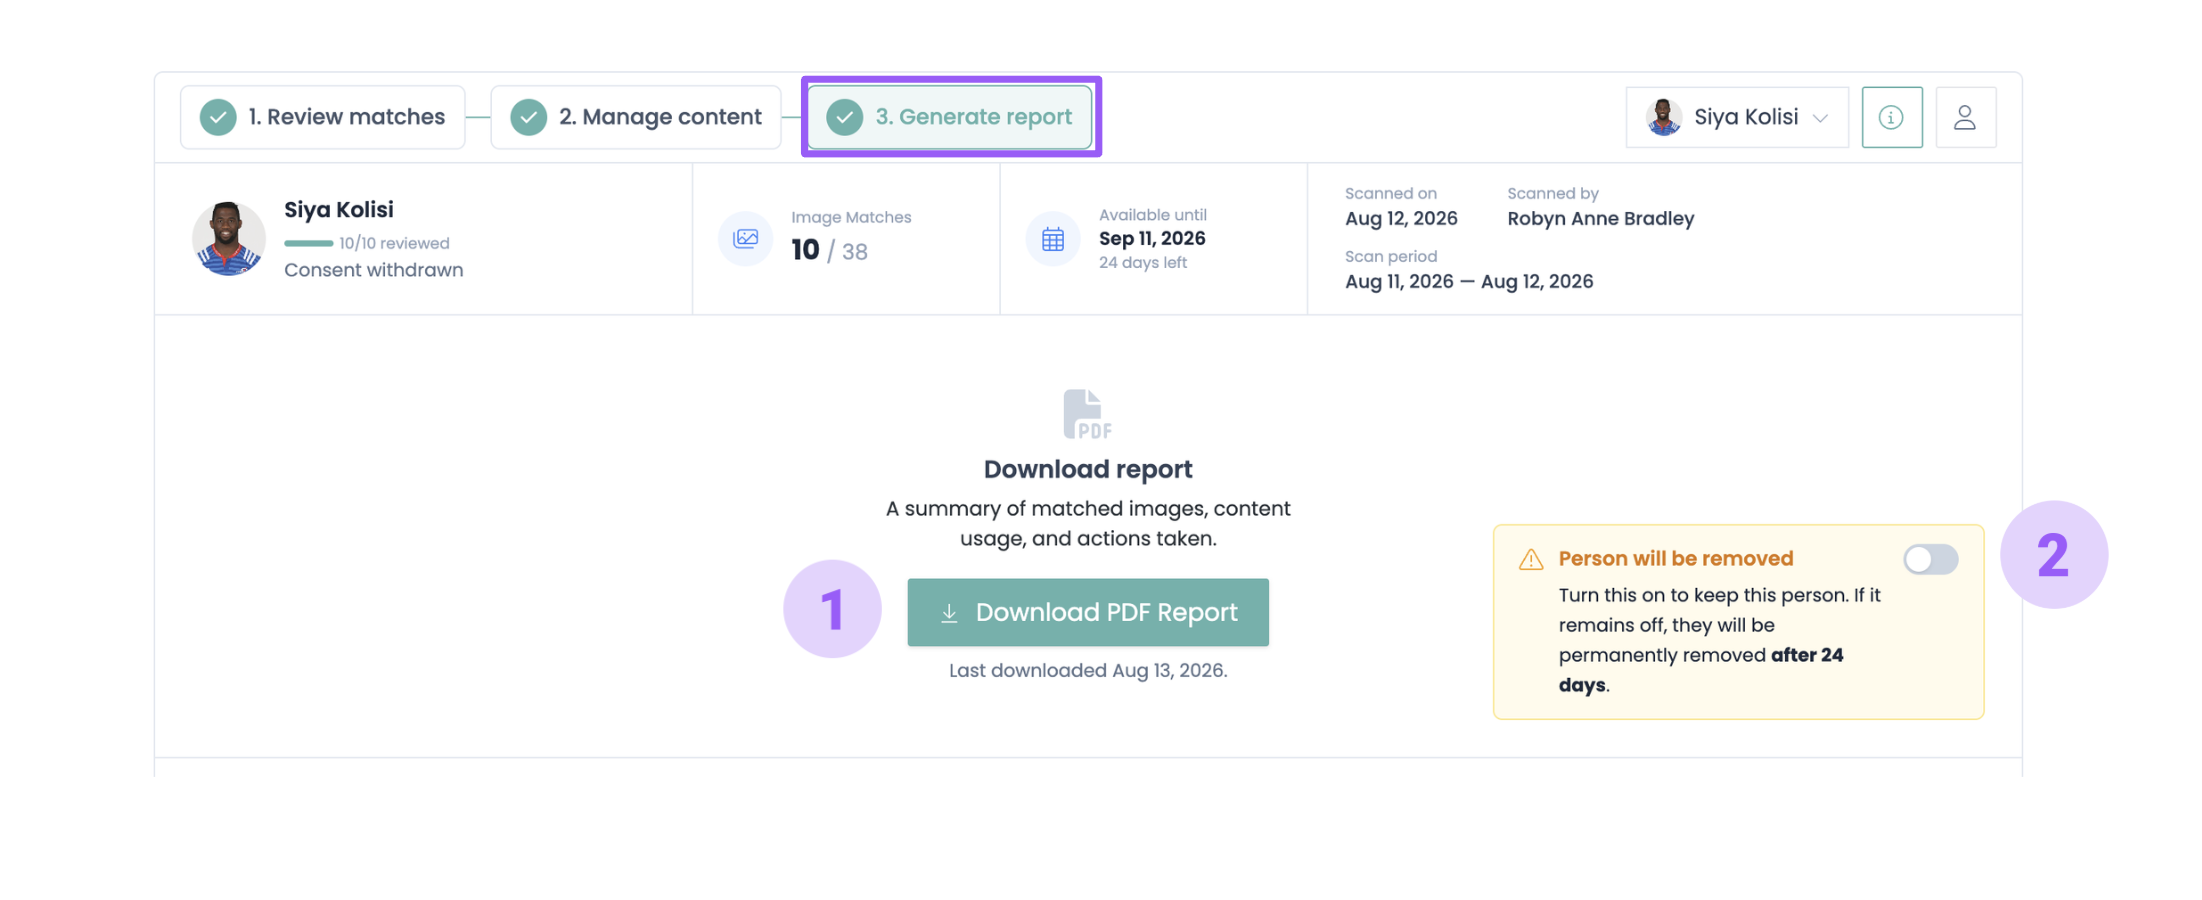
- Click Generate Report on a completed scan, then Download PDF Report.
Scan results are available for 30 days. Download the report before it expires if you need to keep it.
- If the person you scanned for isn't in your People Locker yet, you can add them at the end of the review so they're protected going forward.
Good to know:
- Only existing content is scanned. New uploads are protected automatically through your People Locker and don't need a scan.
- Nothing changes on its own. Time Machine only identifies possible matches - every action is yours.
- You can run more than one scan at a time, for different people.
- Matching isn't perfect. Possible matches are shown for review precisely because automated matching should never be the final word. Check each one.