
Hail Mobile App- Administrator Guide
This guide covers how to manage your organisation's presence and content on the Hail mobile app from the Hail dashboard.
Enabling the Mobile App in your Hail settings
The first step to using the mobile app for your organisation is to turn the app on, in your settings. This enables publishing options on your content editing screens and allows your organisation to be found on the app itself.

- From the Hail dashboard, navigate to your Organisation Settings.
- Select the App tab.
- Tick "Allow your organisation to be found in the Hail mobile app".
- If you are a school, and would like to use the 'Absence Form' - tick that option as well. **
- Click Save.
Once enabled:
- App users can search for and follow your organisation.
- Your organisation will appear in location-based recommendations for nearby users.
- Your content (articles, publications, noticeboards and notices) will be individually shareable to the mobile app - any content you share will be visible to app users who follow your organisation.
To remove your organisation from the app, untick this option and save. Followers will no longer be able to view your organisation or content.
** Info about the Absences Form (Schools Only)
Schools can enable the student absence reporting feature in the mobile app, allowing parents and caregivers to submit absence reports directly via a form.
- In the App tab of your Organisation Settings, tick "Enable Absence Report form".
- Enter the Absence Report Recipient Email Address - this is the email address absence reports will be delivered to (e.g., your school's attendance office email).
- Click Save.
When a parent submits an absence report through the app:
- An email is sent to your recipient email address.
- A copy is sent to the parent's email address.
- The report includes: student name, parent name, classroom, date, contact details and reason for absence.
To disable the form, untick the option and save. The email address will be remembered if you re-enable it later.
> Note: The Absences option is only offered for primary and secondary school organisations.
Organisation Profile in the App
The information displayed on the Organisation Info tab in the mobile app is configured in your Hail dashboard profile:
| App Field | Dashboard Source |
| Name | Organisation name |
| Description | Organisation description |
| Logo / Avatar | Organisation logo |
| Brand colour | Brand colour |
| Contact email address | |
| Phone | Contact phone number |
| Website | Link to website URL |
| Youtube | Link to Youtube channel |
| Location / Map | Organisations physical location |
| Social Media | Organisation social media links |
To update any of these, edit your organisation profile in the Hail dashboard Settings. Changes will be reflected in the app when users next load your organisation.

Brand Colour
Your organisation's brand colour is used throughout the app to theme the interface when a user is viewing your organisation. This includes buttons, links, accents, and the header. Set this in your organisation's profile settings under the Branding tab.
Google Calendar
If you configure a public Google Calendar address in your organisation settings, a Calendar tab will appear in the app for users following your organisation. This displays an embedded view of your calendar events.
Sharing Content to the Mobile App
Content is shared to the mobile app via Hail's standard publishing workflow. Once you publish content (articles, publications and notices), the Hail Mobile App appears as a sharing destination alongside your other sharing destinations (website, etc.).

Sharing Articles
- Create or edit an article in the Hail dashboard.
- Publish the article.
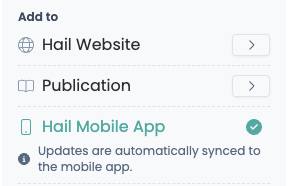
- In the Add to section, click the share button for Hail Mobile App. You can share immediately or schedule for a later date.
The article will appear in the Feed tab for users following your organisation. A push notification will be sent to followers who have notifications enabled.
Sharing Publications
- Create or edit a publication in the Hail dashboard.
- Publish the publication.
- In the Add to section, click the share button for Hail Mobile App. You can share immediately or schedule for a later date.
The publication and its articles will appear in the Publications tab for your followers. A push notification will be sent to followers who have notifications enabled.
Sharing Notices
Notices can be shared to the mobile app in two ways: individually (standalone - without attaching to a noticeboard), and via sharing a noticeboard itself to the mobile app. Noticeboard option is good for departments to use for example: Sports Notices, International Notices, Church Volunteer Noticeboard...
Standalone Notices
These are notices not attached to a particular noticeboard. In the mobile app, these notices appear grouped under the Notices tab. A push notification is sent to your followers when you share a notice.
- Create or edit a notice. (ensure your dates are set correctly!)
- Publish the notice.
- In the Add to section, click the share button for Hail Mobile App. You can share immediately or schedule for a later date.
Via Noticeboards
In the mobile app, these notices appear grouped under their noticeboard in the Noticeboards tab. Notices can be pinned to the top of a noticeboard for priority visibility. The first step is to create a noticeboard and share it with the mobile app:
- Create a noticeboard.
- In the Noticeboard Settings panel, the button for Share to Mobile App is toggled ON by default. If you do NOT want to share a noticeboard to the mobile app, toggle this off before publishing.
- Publish the noticeboard.
- Any notices added to the noticeboard will automatically appear in the app - no need to share individually.
- Each new notice you add sends a push notification to your followers.
> Note: It is possible to share a notice both standalone and via a noticeboard, but we do not recommend this - it will duplicate notices in the app for your followers!
(Note that content is sorted by most recent date- so ensure your content dates are correct)
Push Notifications
Push notifications are sent to your followers automatically when content is shared to the mobile app, either immediately or at your scheduled date and time:
| Content Type | Notification Title | Push Notification Sent to Followers? | Scheduled Sharing? |
| Article | "New Article: [Article Title]" | Yes | Yes |
| Notice (standalone) | "New Notice: [Notice Title]" | Yes | Yes |
| Notice (via Noticeboard) | "New Notice: [Notice Title]" | Yes | No (shared immediately) |
| Noticeboard | - | No | - |
Push notifications are only sent to users who have followed your organisation and subscribed to push notifications. Users are able to follow your organisation without receiving device push notifications for new content.
Removing Content from the Hail App
Once content has been shared to the Hail Mobile App, a tick will appear beside the Hail Mobile App destination in the Add to section:
If you would like to remove the content from the app, simply hover over the tick. The tick will change into a cross icon with the option Remove from mobile app.

Clicking this will remove the content from the Hail app immediately.
Summary of Setup Steps
For a new organisation getting started with the mobile app:
- Complete your profile - Ensure your organisation name, description, logo, contact details, and brand colour are up to date.
- Enable app discovery - Organisation Settings > App tab > Tick "Allow your organisation to be found in the Hail mobile app".
- Optional: Enable Absences - For schools, enable the absence report form and set the recipient email.
- Optional: Configure Calendar - Add a Google Calendar address to show events in the app.
- Share content - Publish articles, publications, and notices, and share to Mobile App individually.